E-mails
Email correspondence, along with telephone conversations, practically constitutes the first form of communication with both potential and regular clients. To enable this form of contact, it is necessary to configure an email account in the system.
Email Configuration in the System
Contractors.es allows for easy configuration of multiple email account names, regardless of the number of departments in the company and the number of people using these accounts.
NOTE: Adding an email account for other users can only be performed by an administrator.
REMEMBER: The purpose of email configuration is solely to read and archive incoming messages. Replying to incoming messages and creating new ones is done through an email program (Outlook, Thunderbird, mobile phone app) or through the web page of the email provider.
You will carry out the email configuration according to the following scheme:
-
Go to the system section “Email → Accounts”.
-
Select the “New” button and fill out the form displayed on the dashboard, paying attention to the fields:
- User - List of users who have access to this mailbox. The field is automatically filled with the data of the logged-in user. The administrator can set up a common mailbox for many users or set up a mailbox for another, single employee.
- Email address - the email address name that the user will use through the Contractors.es system.
- IMAP server address - IMAP incoming mail server.
- Login - login required to log in to the IMAP server.
- Password - a string of characters or letters securing access to the email mailbox.
- Connection security - type of encryption required by the IMAP server.
- Type of authorization - the way the IMAP server authorizes the user.
- Server port - the IMAP server port number specified by the email provider.
- Verify the correctness of the SSL/TLS server certificate - check if the security certificate used by the IMAP server is valid, current, and correctly configured.
- Skip folders - a list of folders that are to be omitted during the import of messages from the mailbox.
NOTE: Depending on the hosting where the email is located, the data will be different. You need to find them in the help section of the email service you are using.
Example: The parameters for configuring email in the “Outlook.com” (Microsoft 365) service can be found on the page: POP, IMAP, and SMTP settings for Outlook.com - Microsoft Support
REMEMBER: The type of authorization specified in the form defines the procedure and security of logging into the mail. The system allows configuration in two ways:
- Password login - remembers the password entered in the form.
- oAuth login - works on the principle of tokens, which are used to confirm identity and access rights. It does not require storing the user’s password on the server.
NOTE: Verifying the correctness of the certificate ensures that the connection is secure and protected against man-in-the-middle attacks. If the certificate is not valid, using the selected email service may involve risk.
REMEMBER: Folders with messages that are skipped during import can be added using the “New” button located under the list with their names. The system by default sets folders named “Trash”, “Junk”, “Social”, “Spam”, “Deleted”, and “Drafts” as skipped.
- Save the data entered into the form with the “Confirm” button.
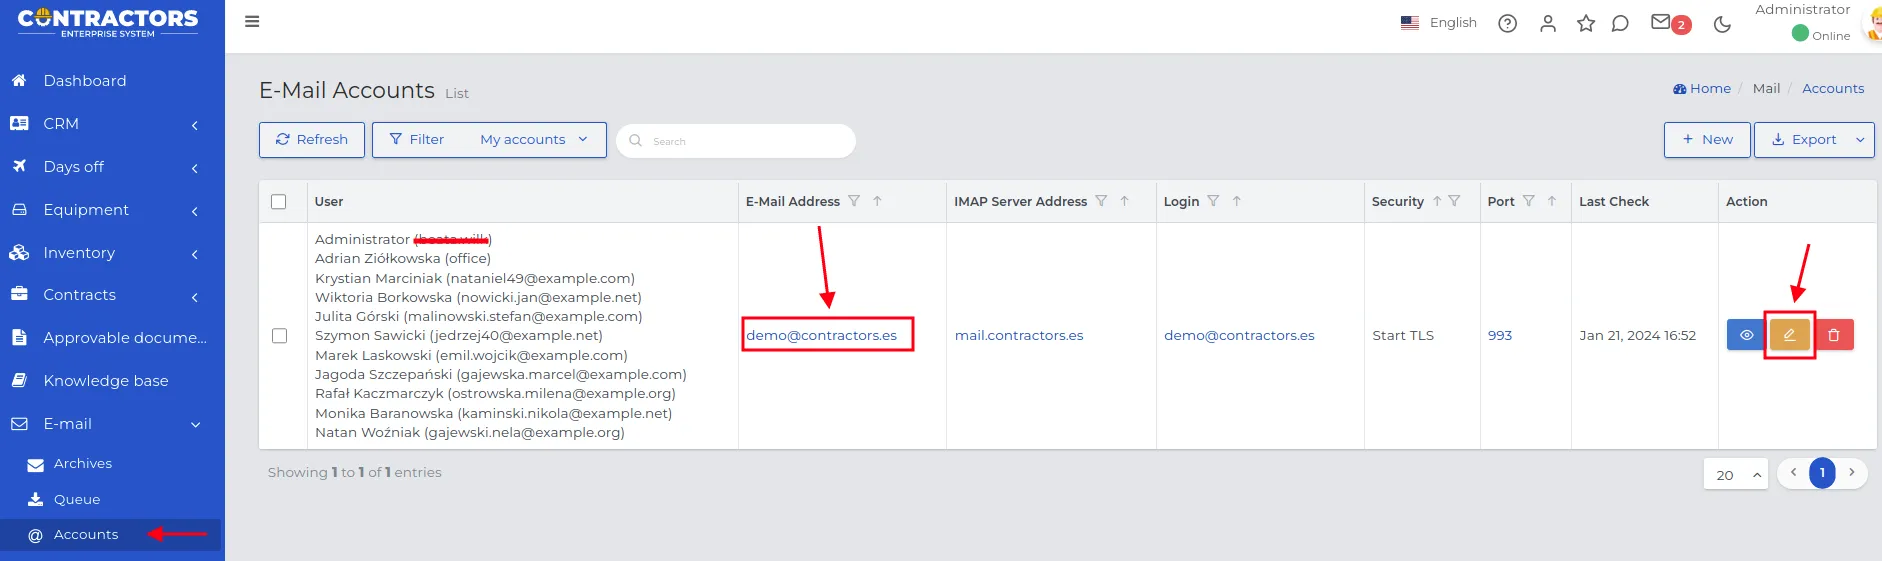
- The newly added email account will appear on the list of records in the “Email → Accounts” section. Each last check of the available number of new messages on the server is recorded by the system and noted in the column marked with a red arrow in the screenshot below.

Adding users to the mail
Employees sharing one email box can be assigned to a specific mailbox in a simple and quick way. There are two ways to do this:
Editing an existing email box:
-
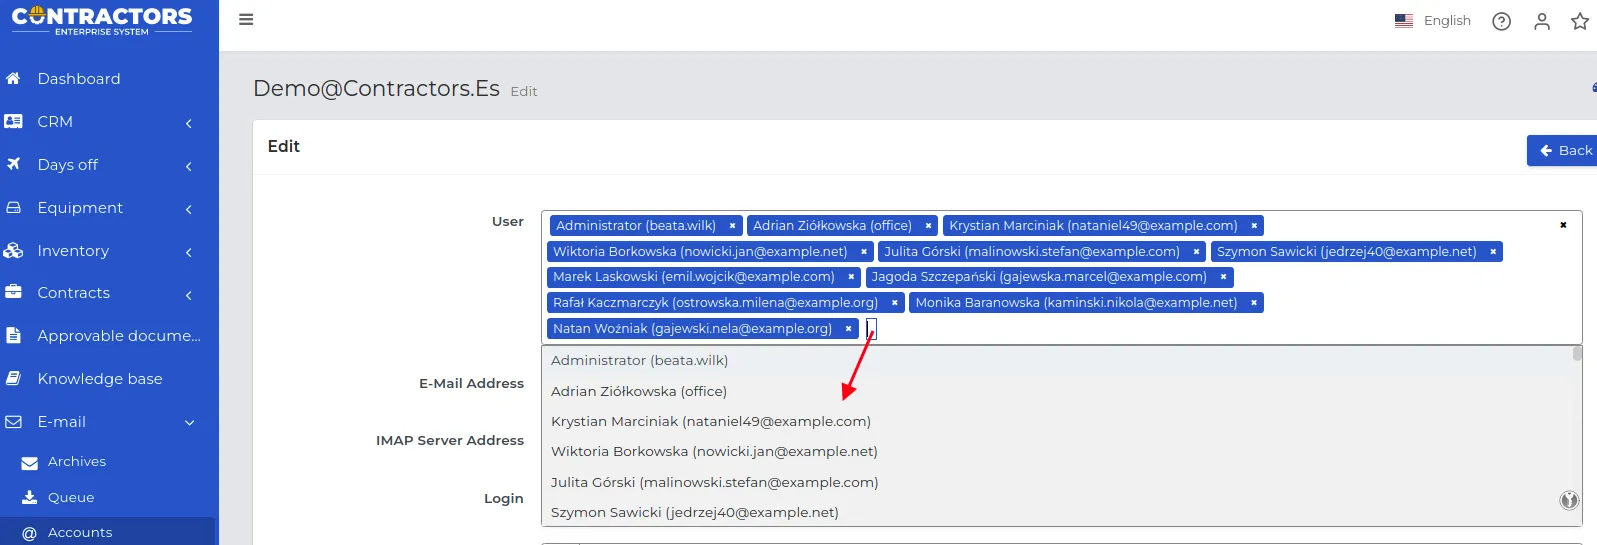
In the “Email → Accounts” section of the system, select the record with the email name to which you plan to assign other users.
-
Click “Edit”, select additional people from the “User” list and share access to the selected email with them.
-
Check the remaining fields in the form and save the changes with the “Confirm” button.
Adding a new email mailbox:
-
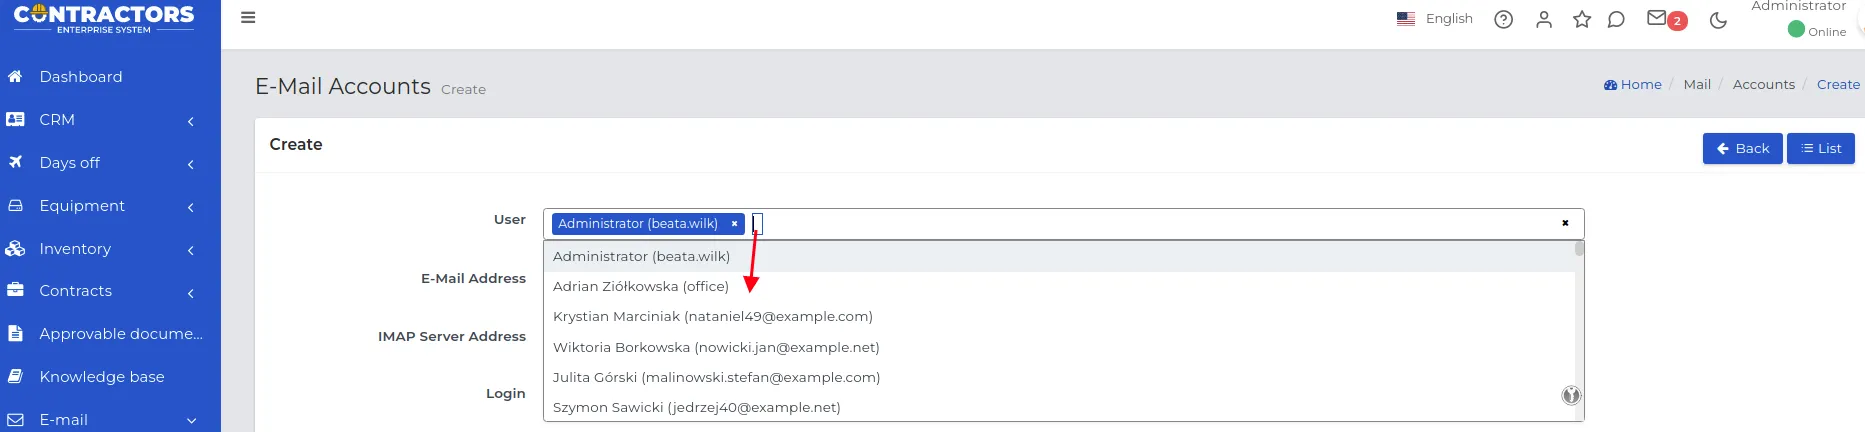
In the email import form, immediately select people from the list who are to have access to it.
-
Continue as described here and save the form with the “Confirm” button.
Email Queue
The list of emails in the “Email → Queue” module is not visible until they are processed by the system. Messages are automatically retrieved by the server at specified intervals.
REMEMBER: To force check for new emails, use the “Check for new emails” button.

The email queue regularly and automatically updates the list of messages on the email mailbox, making it easier to track the latest messages and archive them.
REMEMBER: The graphic symbols next to the email icon on the top panel change depending on the status of the messages being processed on the server.
-
Red circle - indicates the number of unread messages on the server.

-
Blue circle - represents new messages from the last five minutes on the mail server, including incoming and outgoing messages. Messages belonging to groups named “Skip folders” are excluded from the list.

Email Archiving
Email archiving involves moving or storing messages in a way that allows them to be easily found and read in the future.
The email archiving feature in Contractors.es aims to:
-
Preserving Communication History - Archived messages can be easily found in the future, allowing for tracking the history of correspondence related to a project, person, or company.
-
Increasing Data Security - Minimizing the risk of losing important information by additionally storing them in the Contractors.es application.
To archive messages found in the email list, follow these steps:
-
Go to the mailbox using the icon marked below, located at the top of the screen or through the “E-mail → Queue” module.

-
Select the message you want to move to the archive from the list of visible emails and click the “Archive new email” button.

-
A form will appear on the screen to configure the destination for archived messages. Fields can be filled with values from the dropdown list, which concern:
-
Record Type - the type of record with which the content of the selected email on the list is associated, e.g., Companies, Contacts, Warehouse, and Projects.
-
Select Record - the specifically chosen name among those available for the specified type of record above, e.g., Companies -> Spostex S.A. or Warehouse -> Concrete or Projects -> Łomianki Playground Construction.
NOTE: If the content of the message contains a company name that matches the one entered in the Contractors.es system, the system will automatically fill in the fields in the form for related records, e.g., “Spostex S.A.”. However, it is worth manually verifying these fields.
-
Only for users with roles - the ability to determine the group of users who should have access to the attached email message, e.g., office worker, foreman, or project manager. If the email is to be visible to all users, leave the field with this name empty, without making a selection from the list.
NOTE: If a user does not have access to the record to which the email is archived, they will not be able to read the content of that message.
-
-
Save the changes by clicking the “Confirm” button.
-
The selected email will be moved from the queue to the list of records in the “Email → Archives” module. In the “Email attached to” column, you will find information about the place to which it has been attached.

NOTE: Archived messages remain visible in the “Email → Queue” module for 30 days after being downloaded from the server. During this period, they can still be archived to other records in the system.
REMEMBER: After archiving a message, you should edit it in the archive to change who has access to its content. In the next archiving of the same email, the “Only for users with roles” field will not be available.
NOTE: Emails that are in the queue, without a designated place in the “Email attached to” column - have not yet been archived.

REMEMBER: Each message occupies disk space only once, regardless of how many records it has been attached to.
Attaching an email to a record
Messages moved to the “Archive” can be associated with other records in the system, making their content visible to those linked records. You can attach emails to records in the system in three ways:
Method I:
-
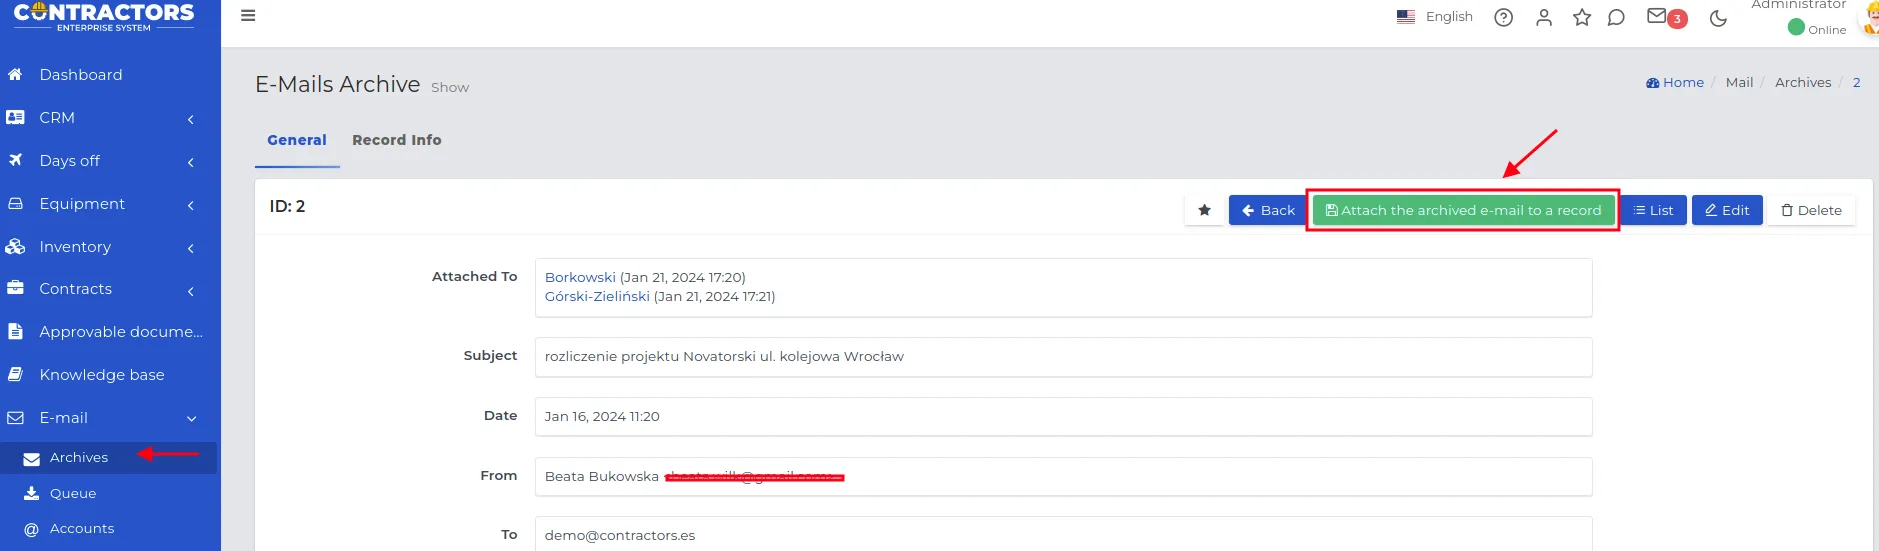
Go to the “Email → Archives” module and select the message you want to attach to a selected record in the system.
NOTE: Attaching emails to other records is only possible after previously archiving those messages from the queue.
-
Click the “Attach this email to another record” button.
REMEMBER: In the column named “Email attached to” you can see the records to which the selected message has already been previously attached.

-
Fill out the displayed form according to the scheme described here and save it by clicking the “Confirm” button.
Method II:
- With the selected message in the “Email → Archives” module, use the “Display” button.

-
In the email preview, click the “Attach to another record” button.
-
Fill out the displayed form according to the scheme described here and save it with the “Confirm” button.
Method III:
-
Select the destination in the system to attach an email from the archive e.g., CRM -> Companies -> Adamski.
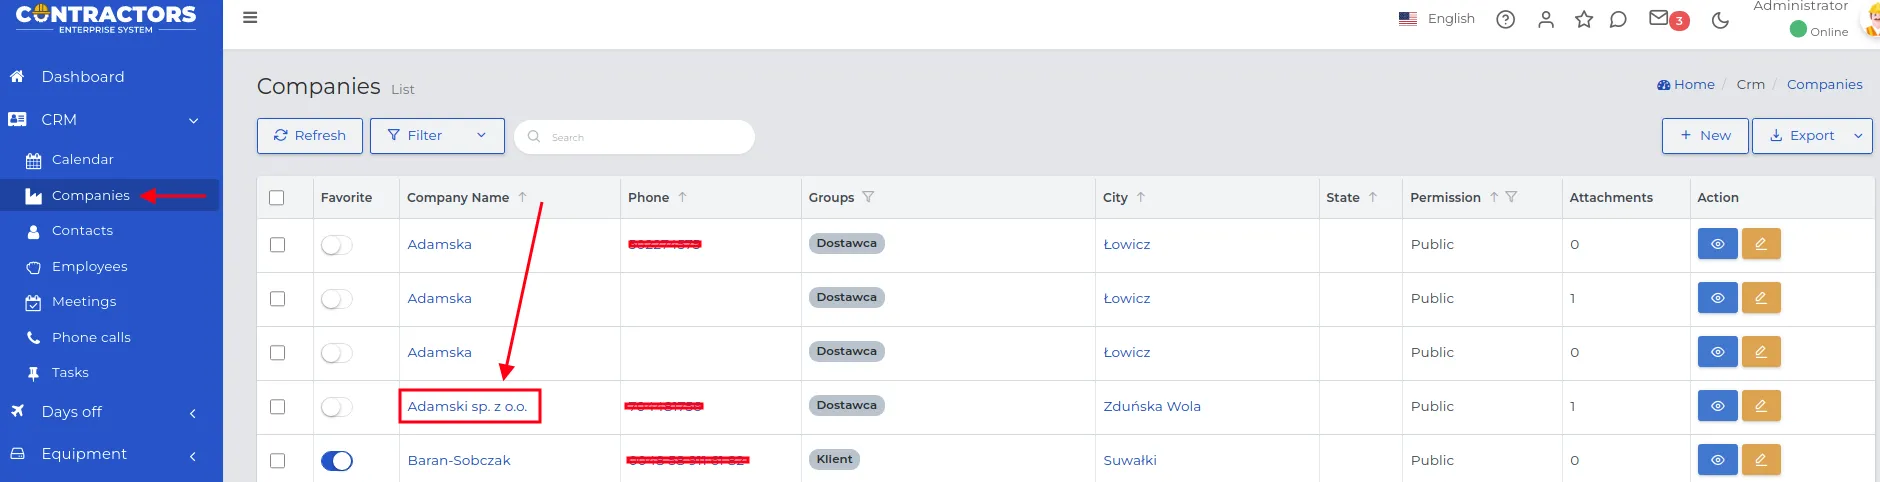
-
Click on the name of the selected company and after displaying its preview, select the “Attached - Emails” tab.
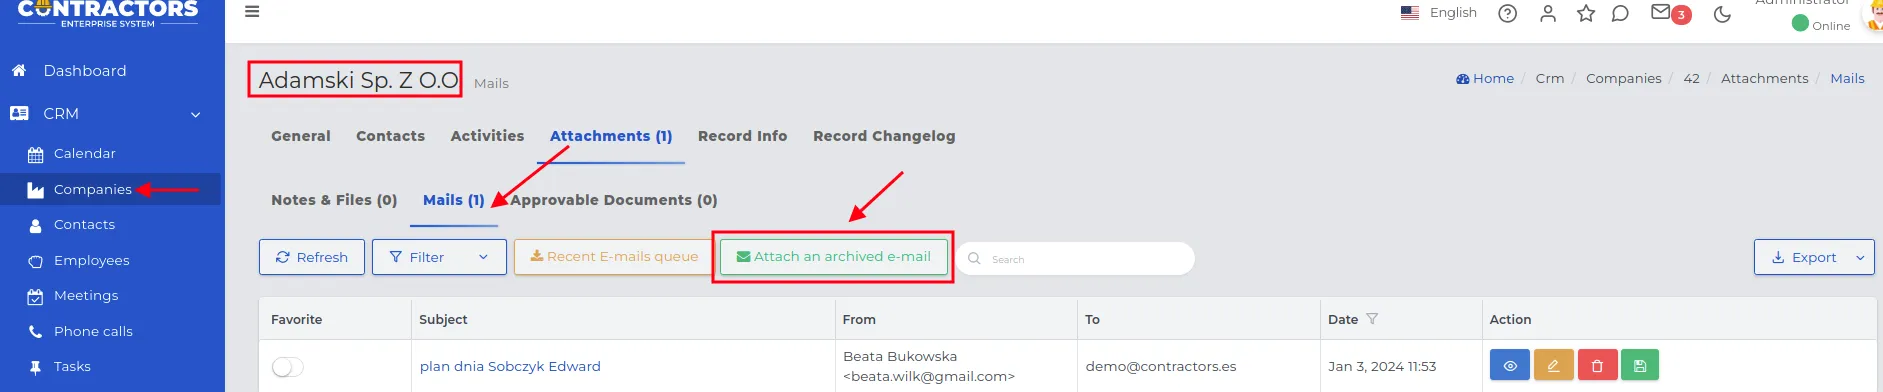
-
Choose the “Attach archived email” button.
-
From the list of archived messages, select the one you want to pin to the Adamski company record.
-
Click the “Attach this email to another record” button.”
-
The form fields will be automatically filled with the data of the record you are currently in.

-
Verify their correctness and save the changes with the “Confirm” button.