Notes and Documents
Adding various notes and documents is meant to facilitate the management of information and documentation within the system. These can include, among others, projects, technical documentation, photos of damages, service reports, test protocols, as well as any other documents that facilitate communication within the team.
Notes, files, and documents are visible in the record preview under the “Attached” tab.

REMEMBER: By attaching documents and files to records, system users have easy access to the necessary data, which helps them make appropriate decisions based on complete documentation.
Adding Notes and Files
To add notes and files in system records, follow these steps:
-
Go to the “Attached” tab in the selected record.
-
Select the “Notes and files” option and click the “New” button.
-
Fill out the form, paying attention to the fields:
-
Pinned: Setting to “Active” will display the note at the beginning of the list of notes.
-
Title: The name of the note.
-
Category: Choose the type of category to which the entry should belong.
-
Files: The ability to add files from the disk as attachments.
-
Permissions: Define employee access to system records. You can find more about permissions here.
-
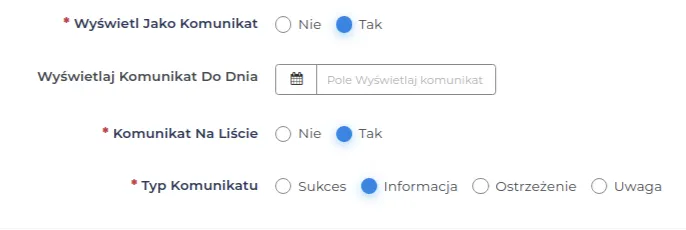
Display as a message: Checking this option will display the added note as a message.
Settings regarding how the message is displayed can be determined in the further part of the form.
-
Display message until: Defines the time range in which the message is to be displayed.
-
Message on the list: Determines where the message in the form of a note is to be displayed, whether on the list or outside of it.
- Choosing the option “No” - the message will be visible in the record preview, just below its name.

- Choosing the option “Yes” - will cause the message to be visible above the list of records.

REMEMBER: If you want to find out which record the displayed message refers to, click on the button marked in the screenshot above.
- Type of message: Determines the form of the message delivery, which is defined by the background color.
Success - green color

Information - blue color

Warning - white color

Attention - red color

- Save the entered data with the “Confirm” button.
Acceptable Documents
If the administrator has properly set up the ability to attach an acceptable document to another record (description here), then in the view of such a record in the “Attached” tab, you can add an “Acceptable Document”.
To add it, follow the scheme:
-
Go to the “Attached” tab in the selected record.
-
Choose the option “Acceptable Documents” and click on the “New” button.
-
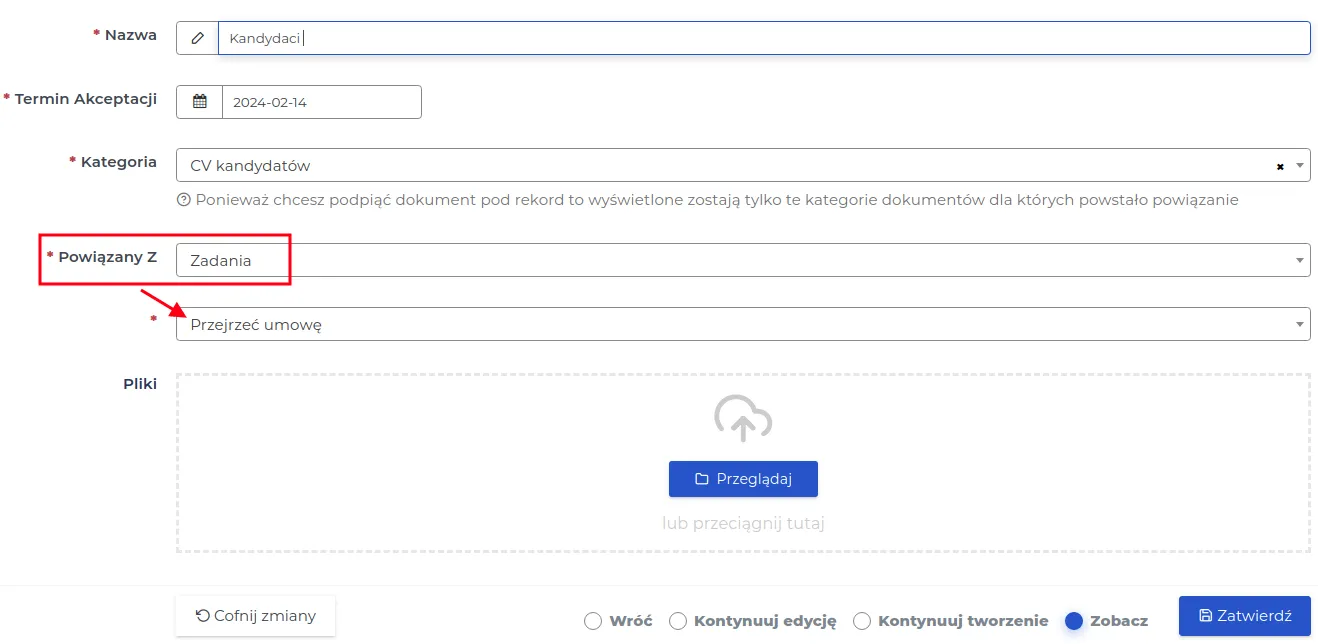
Fill out the form, paying attention to the fields:
-
Name: The name of the document.
-
Acceptance deadline: Specifies the date by which the document should be accepted.
-
Category: Determines the type of document.
NOTE: Since you want to attach the document to a record, only those document categories for which a link created by the administrator is displayed.
The system will suggest values in the subsequent fields according to the further linkage entered into the system.
REMEMBER: Acceptance of a document submitted for approval requires attaching a file or entering content.
Document Acceptance
The list of documents for acceptance only displays records associated with the logged-in user, regardless of their category. The system displays documents for acceptance with the status “Pending my acceptance”. The list can be sorted according to preferences, using the methods described here.
NOTE: Only users with the appropriate system permissions have access to the “Acceptable Documents” section.
REMEMBER: The types of document categories suggest how many approval stages the created document belonging to the selected category will have, for which settings have been set by the administrator.
NOTE: Exceeding the deadline for document approval will result in the record being displayed with a red warning background.
To accept or reject a submitted document for approval, follow these steps:
- Go to the “Acceptable Documents” menu and select the document you want to review.
NOTE: You can add an acceptable documents applet to your dashboard to be informed about new documents.
- Review the attached files and go to the change form by clicking the “Accept” button.
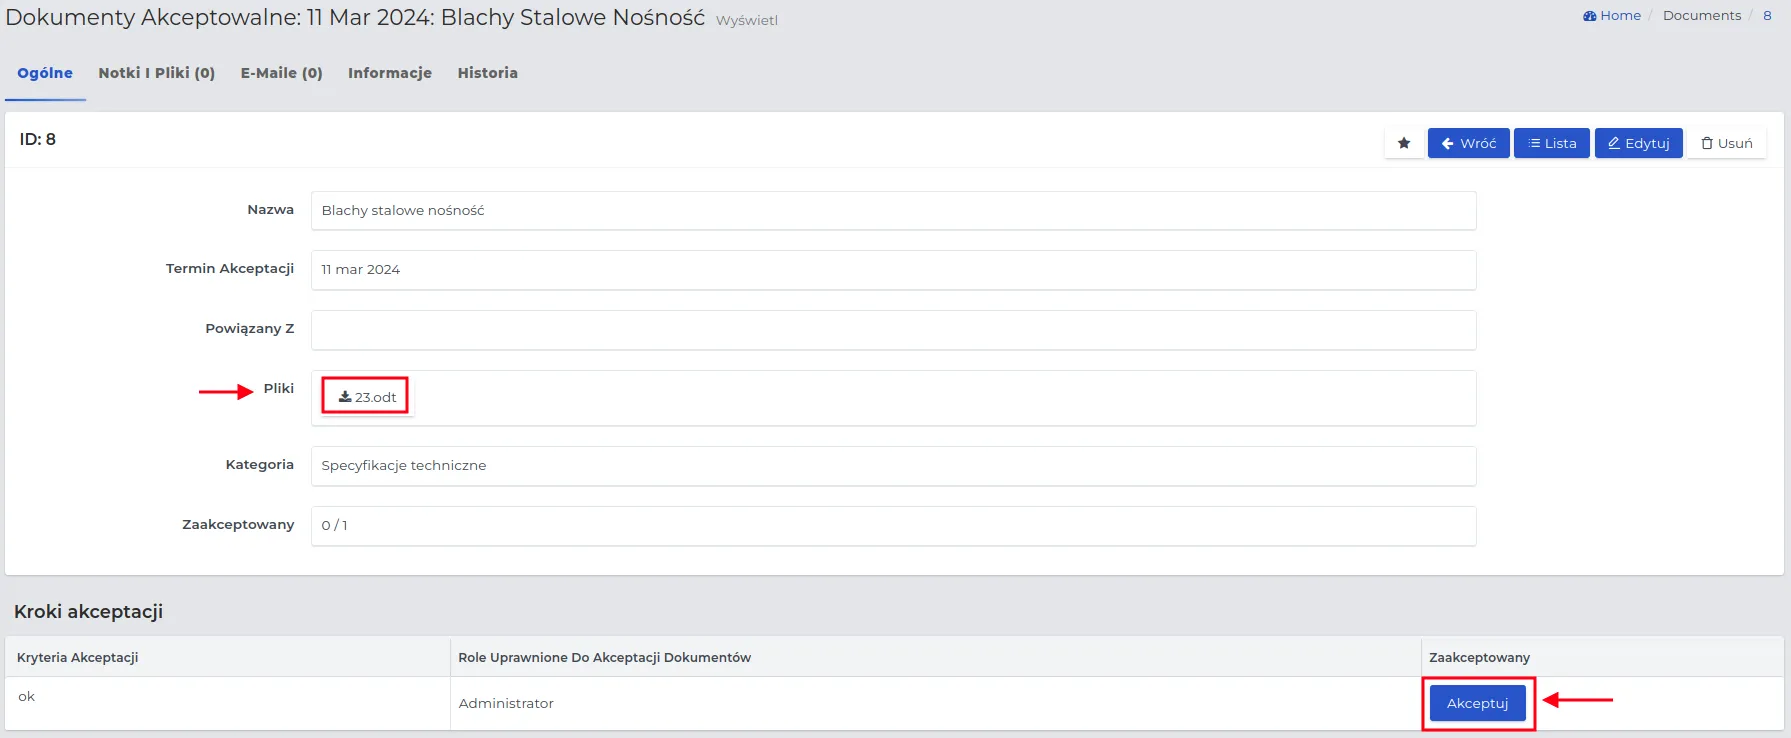
- Determine the document status by selecting its acceptance or rejection.
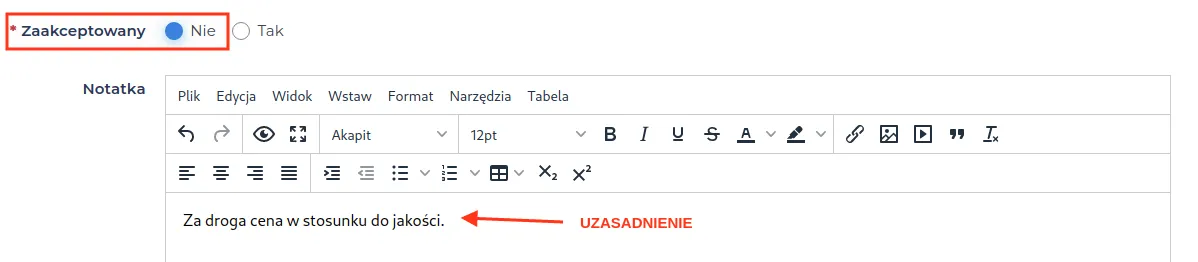
REMEMBER: You can enter a justification for your decision as a note.
- Save the changes using the “Confirm” button.
REMEMBER: Unaccepted documents are moved to “Rejected” and can be re-accepted after editing.
NOTE: Documents removed from the acceptance list are moved to the “Trash”, where the administrator can restore them to the list by clicking the “Restore” action button.
Multi-stage Approval Procedure
The time for document approval depends on the number of steps and the time needed for each of them, as well as on the workload and any problems.
NOTE: The steps of the multi-stage approval of a document are carried out sequentially according to the settings introduced for a given document category. Editing of approval steps has been described here.
A document requiring multi-stage approval goes in the appropriate order to the people who are marked on the list.

If the first person authorized to approve accepts the document, its status will be changed to “Accepted Yes”, and then the document will be passed on to the second person authorized to approve according to the list.

REMEMBER: The document will be fully approved when all roles on the list authorized to approve it have done so.