First Steps - Configuration
After registering an account and logging in as an administrator, you will receive instructions on how to configure the system. Before you start, we recommend going through all the steps to tailor the system to the unique needs of your company.
Step 1: Review the general system settings.
The first step is to adjust the general system settings, which are available in the Admin -> General Settings menu. The general system settings are crucial for customizing it to the needs of the company.
-
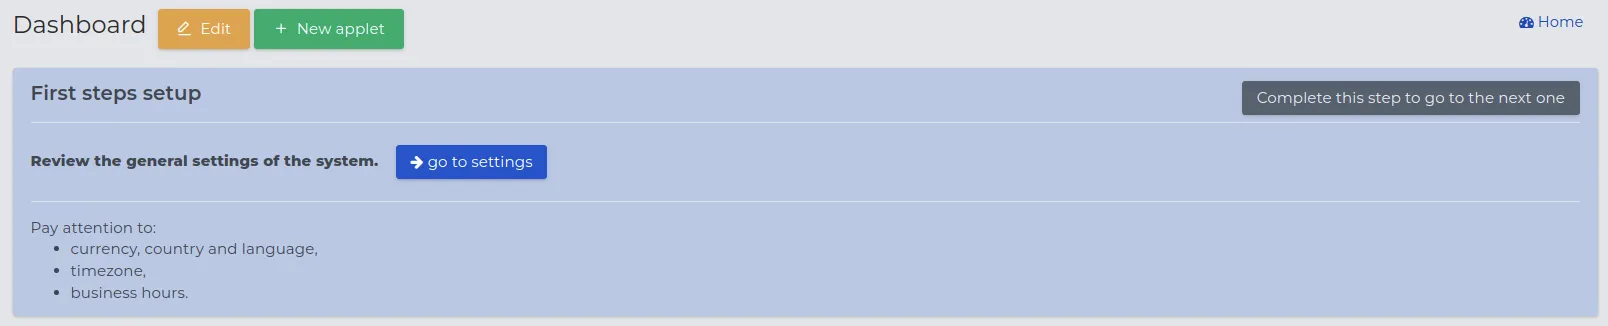
Verify and adjust settings such as: calendar, working hours, language, time zone, currency, sidebar appearance, by going to the settings using the button:

NOTE: Most parameters are configured automatically by the system taking into account the current location of the company. However, in some cases, there may be a need to make minor changes.
-
Review the values for field names that have been automatically filled in by the system:
-
Logo - allows you to set the company logo that will be displayed in the system (e.g., during login).
-
Header - content that appears on the user login screen.
-
Country, province, time zone - set automatically, it is worth verifying the values set by the system. Missing information should be completed.
-
Default currency - the currency that will be set as the first choice in currency fields.
-
Units of measure - the default system of units: metric or imperial.
-
CRM: Calendar - hours range - the range of hours available in the CRM calendar.
-
CRM: Calendar - duration of the time slot - the minimum time range visible on the CRM calendar.
-
CRM: Calendar - default working hours - the range of hours for a working day.
-
Main company - the company that uses the system.
-
NOTE: During some stages of configuration, short tips will appear. They may concern changes that are set by default or decisions that you will have to make.
REMEMBER: To proceed to the next step of the setup, simply click on the field:
![]()
NOTE: If a setup step is not completed, a message will remain visible at the top of the screen:
![]()
REMEMBER: With an unfinished initial setup, upon re-logging, you will be able to continue the configuration without losing previously entered data.
NOTE: After each completed step, a percentage of the setup completion will be displayed, indicating the remaining amount to be completed.

Step 2: Review the leave settings.
The next stage is to set the rules for the company’s leave plan, which is available in the Admin -> Leave Settings menu. The system will take into account the settings entered when settling employees, determining the number of entitled leave days depending on the days worked. These data have been set by default in the system and can be changed.
-
Verify and adjust the default settings visible after selecting the “Go to Settings” button.
-
Proceed in the same way as in Step 1.
REMEMBER: The leave plan in Poland is regulated by the provisions in the Labor Code.
Step 3: Create departments and squads in your company.
In the next step, the system settings relate to the names of departments and squads, the number and availability of which you can adjust to the needs of the company. Settings for this step of the configuration are available in the Admin -> CRM -> Departments menu. By default, three departments have been set up in the system: “Administration”, “Painting”, and “Flooring”. They can be changed using the “Edit” button.

-
Read the visible tip and “Go to Settings”.
-
Verify the names of the default set departments and create additional departments if there is a need by clicking the “New” button.
NOTE: The system administrator is automatically assigned to the “Administration” department and can also add themselves to other departments.
REMEMBER: Assigning employees and granting them roles and functions will only be possible after completing the simplified system setup. The method of creating accounts for system users has been described here.
- Create brigades associated with departments. First, display the selected department name, and then start adding brigades to it using the “New” button.
Example brigades created for the “Painting” department, e.g., wall brigade, ceiling brigade.
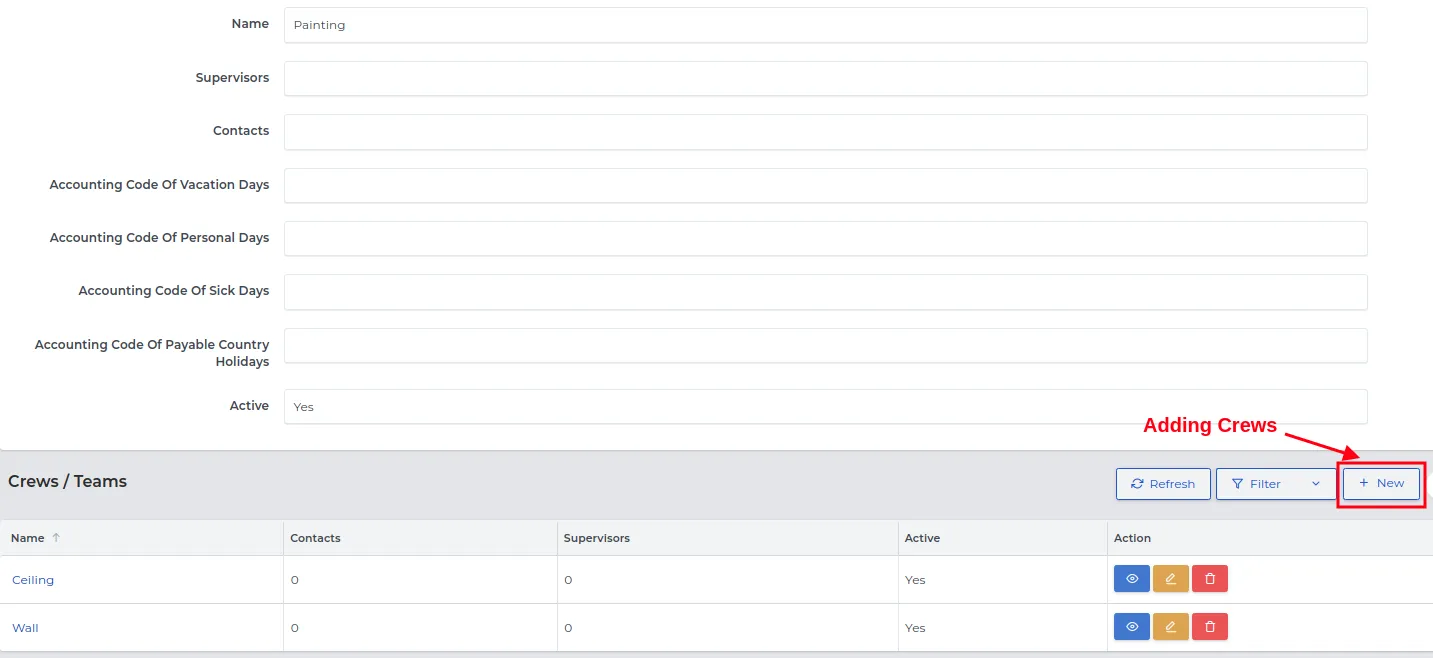
- Save the brigade creation forms using the “Confirm” button.
NOTE: Every contact or brigade added to a specific department prevents the future removal of that department. You can find more about the relationships between records here.

Step 4: Create at least one project manager.
The “Project Manager” role that can be set in the system will depend on the number of requirements in the company related to this position. These system settings are available in the Admin -> Access -> Users section. Depending on the role assigned, the user is simultaneously granted the appropriate permissions, which you can learn more about from the information recorded here. This step can be skipped along with selecting the last available option “Disable the project manager function”.

-
Choose one of the four available options proposed by the system:
I. Set yourself as the project manager.
-
Click the “Go to edit your contact” button.
-
In the dropdown list in the “Groups” field, select the name “Project Manager”.
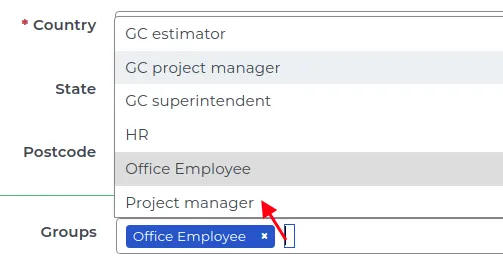
NOTE: The information visible on the blue field confirms that you have an account set up in the system and for each new “Group” name you are added to, the appropriate permissions will automatically be assigned to you.
![]()
- Verify the correctness of the data entered into the form and save the changes with the “Confirm” button.
REMEMBER: Make a selection in the “Permissions” field, where the available options on the list are described here.
II. You can create a contact for a new employee, assign them to the “Project Manager” group, and in the HR tab set them as an employee, and then create a user for them.
-
Click the “Create contact” button.
-
Fill out the form by entering the details of the employee who is to serve as “Project Manager”.
-
From the drop-down list in the “Groups” field, select the name “Project Manager”.
-
Make a selection in the “Permissions” field according to the description available here, and then confirm the changes by clicking the “Confirm” button.
-
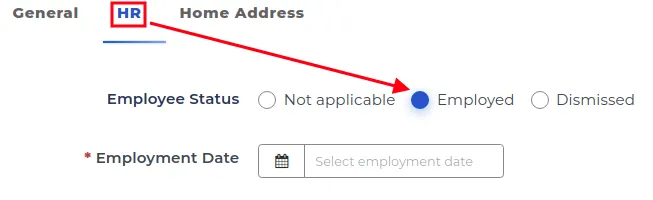
In the preview of the displayed form, go to the “HR” tab, set the Employee Status to “Employed” and save the data using the “Confirm” button.
-
In the upper right corner, click on “Create user”.

NOTE: Creating a user account in the system is only possible after changing the employee’s status to “Employed”.
- Fill in the fields on the displayed form and save the changes with the “Confirm” button.
REMEMBER: In the “Roles” field, define the “Required” values, without which it will not be possible to select any employee from the list, e.g., a Project Manager must also be an office worker.
III. You can assign another existing employee contact to the “Project Manager” group.
- Click the “Show employees” button.
NOTE: You are currently the only employee entered into the system. The values for the fields available in this option will remain empty until they are filled with information about other employees. Then you will be able to proceed according to the scheme described below:
- Choose from the entered employees the contact to whom you want to add the “Project Manager” group.
REMEMBER: An employee entered into the system must meet certain “Requirements” to be able to be assigned to several groups at the same time.
-
Click on their name, go to the edit form, and add or change the group name previously assigned to them.
-
Save the changes with the “Confirm” button.
IV. Disable the project manager functions.
-
Click on the “Go to settings” button.
-
In the “Value” field, select the “No” option and save the changes with the “Confirm” button.
- Fill in the form displayed according to the choice made and proceed to the next step of the system configuration.
Step 5: Create at least one project manager assistant.
This configuration step is identical to the one described in Step 4 and can be skipped by selecting the last of the possible options “Disable the project manager function”.

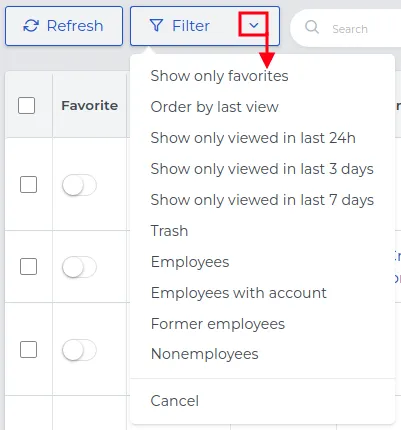
NOTE: If you previously created an employee account, the system will automatically display it on the list when you select the third option in this configuration step.
REMEMBER: You can change the visibility of records by selecting a different range from the available options on the list.
Step 6: Create at least one estimator.
In this stage of configuration, the procedure is similar to steps 4 and 5. Unlike previous stages, this step is mandatory. You must choose an estimator from among the employees and system users.

NOTE: In this step, you cannot disable the Estimator function.
REMEMBER: Depending on the number of parallel works on projects, there may be several selected Estimators in the system.
Step 7: Create at least one foreman.
The settings required in this step are identical to those described in Step 6. You cannot skip this step. You must choose a foreman from among the employees and system users.

NOTE: In this step, you cannot disable the Foreman function.
REMEMBER: Depending on the number of parallel works on projects, there may be several selected Foremen in the system.
Step 8: Review contract management settings.
In this configuration step, review the contract management settings available in the Admin -> Contracts -> Settings menu. These parameters affect the management and monitoring of agreements between the company and clients. Default values are already set for most fields, but you can change them according to your needs.
-
Verify and adjust the default settings visible after selecting the “Go to Settings” button.
-
Make any changes by clicking the “Quick Edit” button next to the selected record and save them with the “Confirm” button.
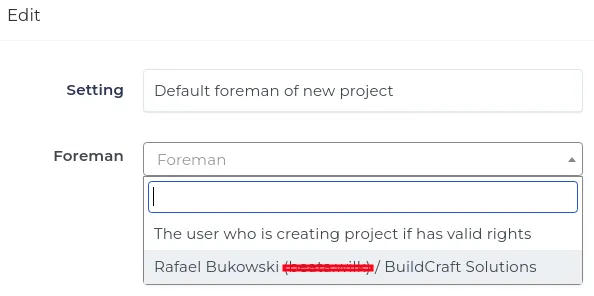
REMEMBER: Assigning values to fields starting with the word “default” means that these record names in the system will automatically be filled with entries specified in the form. You can specify who will be visible in a given group by choosing one of the following settings:
-
The user creating the project, if they have the appropriate permissions. This means that any user who creates such a document will be visible, provided that they belong to the given group and perform the appropriate roles in the system.
-
A specific user selected from the list belonging to the given group (e.g., Cost Estimator).
Step 9: Review work scheduling settings.
The next stage of configuration concerns the work scheduler, available in the Admin -> Contracts -> Scheduler Settings menu. The parameters visible on this list can affect better control and efficient management of projects using employee work. Default values are already set for most fields, but you can change them according to your needs.
-
Verify and adjust the default settings visible after selecting the “Go to Settings” button.
-
Make any changes by clicking the “Quick Edit” button next to the selected record and save them with the “Confirm” button.
NOTE: The notification sending time determines the hour at which the employee receives information about the upcoming work assignment, i.e., the place and time to report for the project.
REMEMBER: In order for an employee to receive notifications about work assignments, they must have the Contractors.es mobile app installed on their mobile phone. You can read more about the mobile app here.
REMEMBER: The limits set in the fields regarding informing the supervisor about being late or leaving work early, as well as the employee moving away from the place of assignment, are recorded in the web application under Contracts -> Planner -> Review Events. Events recorded in this way will help determine how honest and conscientious a given employee is.
NOTE: In conjunction with GPS navigation, you will receive warning signals when the limits you have set are exceeded by the employee.
REMEMBER: The employee does not receive notifications about exceeding the limits you have set.
Step 10: Create general types of work that you perform in your company.
At this stage of configuration, set up the types of work available in your company. In the Admin -> Contracts -> Project Types menu, the system has by default defined the most commonly encountered areas of construction work, such as: Construction, Renovation, Expansion, and Support.
- Verify and adjust the default settings by clicking the “Go to Settings” button.
- Make any changes by quickly editing the selected record and save them using the “Confirm” button.
- Add new types of work (e.g., Installation, Demolition) using the “New” button and save them with “Confirm”.
NOTE: Without adding a new type of work, you will not proceed to the next step of configuration.
REMEMBER: Records added to the list can only be deleted until they are associated with other system records.
Step 11: Create work scopes. This is also your price list.
In this step, select work scopes from the available list in the Admin -> Contracts -> Work Scopes menu that best reflect the profile of your company. The system has entered a list with the names of the most commonly encountered work scopes in the construction industry. These include, among others, Foundations, Smokestacks, Laying floor panels.
-
Verify and adjust the default settings by clicking the “Go to Settings” button.
-
You can watch a video that step by step shows how to create work scopes.

-
Remove unnecessary work scopes from the list, and determine the valuation methods for the remaining ones.
-
In the form, mark the selected valuation method among the available: individual, according to an adjustable unit rate or hourly rate, or according to a fixed unit rate or hourly rate.
NOTE: Depending on the type of valuation you choose, the number of fields in the further part of the form you fill in may change. Changes will correspondingly affect valuations according to: adjustable and fixed hourly rates (value specified in PLN for the hourly work rate), and adjustable and fixed unit rates (value specified in PLN for 1 unit, number of units, and estimated number of hours allocated for 1 unit).
Examples of valuations available in Contractors.es:
- Individual valuation - roughly determines the value of performing a specific scope of work.
Example: Digging a well depends on many factors, which the contractor determines. The method is based on life experience and the calculation of basic materials. It is used when a company provides a narrow range of services with similar profitability.
- Adjustable rate per unit / per hour – a flexible option, tailored for a unit, dependent unit, operational department, or individual process. It differs from a fixed rate by considering current market factors.
Example: The demolition of a building in the city center, with restrictions and procedures imposed by the City Hall, requires a valuation based on variable unit costs. The contractor must consider these factors in the overall calculation.
- Fixed rate per unit / per hour – a simple and often used method, determining the final value of the service for a specific task.
Example: When valuing the laying of floor panels, the contractor measures the area and multiplies it by the established unit value per m2. The worker is charged per hour of work according to the set hourly rate. Market prices are imposed by professionals in the field, usually, they are similar to each other.
NOTE: When estimating a project, determine whether you include the cost of materials. If the client provides the material, indicate: “Estimated Material Cost – No”.
REMEMBER: If there are associations with other records in the system for a given scope of work, you cannot remove it from the list. However, you can deactivate the “Activity” option, which will make this scope no longer available for selection when creating another estimate in the system.
- Add new types of work scopes (e.g., Deck Laying) using the “New” button and save them with “Confirm”.
Step 12: Thank you for setting up the system.
You have successfully reached the end of “First Steps with the System”. Save the settings you have entered using the button:
![]()
We invite you to add the rest of the staff, import contacts and companies, and to create your first project, complete the inventory list, and many other activities using the instructions available for different system modules. Don’t forget about our mobile app for manual workers. If you have any questions, feel free to contact us. We are ready to answer them and provide assistance.